You don’t need to be an expert photographer, or splash out on expensive photo shoots. Amazon sellers can easily stand out from the competition simply by optimising marketplace product images.
To achieve polished product photos for your product listings, you need to follow a few simple rules. With a combination of lighting, background, and retouching tips from product photography experts, you can achieve consistent, professional results. Even for those on a tight budget.
Here are 7 quick tips on DIY product photography:
#1 Prepare

This is a step that most online sellers often overlook. Organising your shoot beforehand makes all the difference. Start by creating a list of products you intend to shoot, the type of photos you need (i.e. quantity, angles, variations etc) and tools. Shoot similarly sized products back to back, as this will save lots of time. And of course, make sure all your products are cleaned, polished, ironed or dusted ahead of time.
#2 Camera
Product photography doesn’t mean you need state of the art equipment. Anything from your smartphone to a DSLR works perfectly. Most modern smartphones produce quality, high-resolution results. When it comes to taking product photos, take advantage of the tools you have at your disposal.
#3 White background

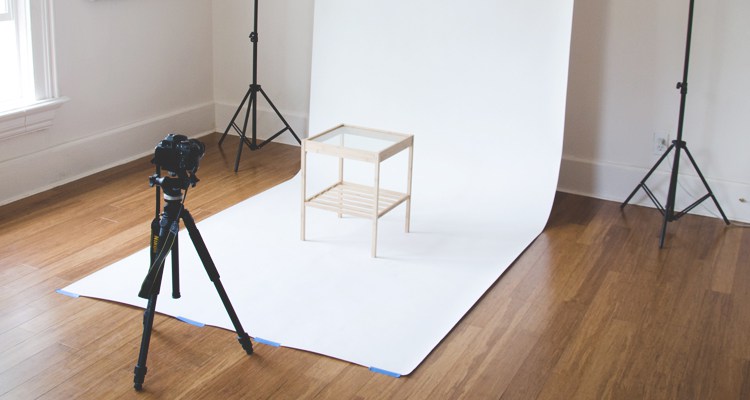
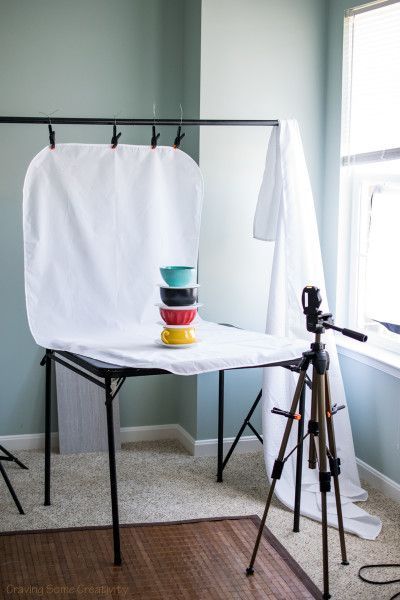
Shooting against a white background will significantly reduce post-photography editing. I’d highly recommended you use a ‘sweep’, a white backdrop, like a white bed sheet. A sweep reflects white light onto your product, resulting in a well-lit product, leaving you with very little post-shoot editing.
#4 Lighting

When it comes to lighting, you have two options: natural or artificial. Whatever you do, avoid using the flash at all costs! Natural lighting is the most cost effective and simple option, especially for those on a budget. Using indirect sunlight as your light source is a quick and easy solution, with fantastic results. Artificial lighting comes in many different shapes and sizes. A basic setup requires three lights: two on either side of the product and one above. A light tent is ideal for shooting small products.
#5 Stability
To make sure you achieve crisp photo photos it’s essential that you make sure your camera is stable. A tripod or smartphone mount will do the trick, or if you don’t have that to hand just use a stable surface, like a table or stack of books. Trust me when I tell you, stabilising your camera will make your life so much easier, and the end results will speak for themselves.
#6 Multiple Angles

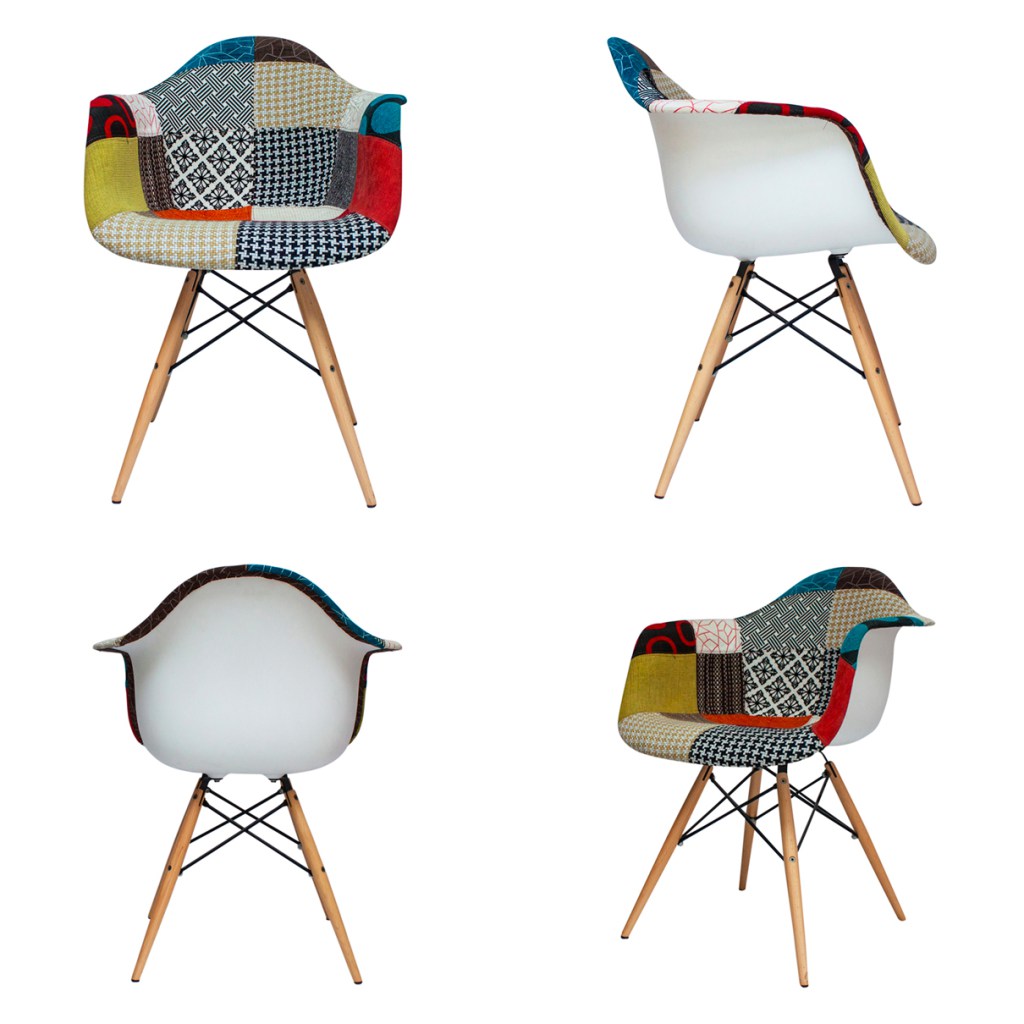
Results have proven that more product photos equals more sales. Make sure you provide a variety of high-quality images, ideally giving online shoppers a 360 view of the product. Try to capture closeups, texture, feature and multiple angles.
#7 Editing

Last, but certainly not least, photo editing. This step turns average product photos into top sellers. Removing the background and a combination of retouching tricks will give you studio-worthy, professional results. Alternatively, why not leave it to the professionals! For less than $2, Pixc will return your professionally edited product photos within 24 hours. Why not upload an image for free, and see the results for yourself.
Amazon Photo Editing Requirements
Now that you’ve mastered your product photography, you’ll need to know Amazon’s photo editing requirements. Unfortunately, Amazon’s photo requirements are some of the most detailed of all online marketplaces. But, don’t worry, we have you covered.
Amazon only accepts the following file formats: TIFF, JPEG, GIF, and PNG. In addition, each image needs to have at least 1000 pixels on each side and you can only use either CMYK or RGB colour models. Photo file names must include your product’s UPC (ASIN), followed by a full stop and then the file extension. Usage of additional characters, such as dashes or spaces, prevent images being visible on your product page.
Main product image requirements:
Must be a photograph of the product.
Must be clear, no additional objects allowed.
Must be well-lit, focused, with realistic colours.
Product must be in full view.
Product items must take up at least 85% of the frame.
Music/DVD/books must show the front cover and fill the entire frame.
Background colour must be pure white (RGB 255.255.255.255).
No text or graphics allowed.
Additional images requirements:
Images must include the product.
Other products or objects can be used to show scale.
Product and/or additional objects must fill at least 85% of the frame.
Close-ups and/or cropped photos are allowed.
In context and different backgrounds are allowed.
Text and graphics are allowed.
And finally, 4 bonus tips for selling on Amazon
Here‘s a quick summary of insights from a recent 2017 survey on 2,500+ Amazon sellers covering everything from successful growth tactics to their current business model.
1. Starting sooner is better
The longer you run your business, the more chance you have of being successful. The sooner you get started, the sooner you can start building your reputation. The survey showed that after 18 months, roughly 50% of sellers reported monthly revenues of $10k.
2. Starting small is good
You don’t need massive upfront investments to get things off the ground. Ultimately, initial investments don’t have any bearing on long-term success. Don’t be afraid to start small, and start now.
3. Sell more products
If you’re looking to increase profits, increasing the amount of products is a quick win. The survey showed that 10 products was the sweet spot. It’s up to you to keep an eye out for hot products to test out, and scale the ones that take off.
4. Expand into new markets
Once you have a solid product base, expanding into international Amazon marketplaces showed the most significant increase in profits. Additionally, you might want to consider investing in setting up your own eCommerce website.
So, there you have it. Some quick tips on how to turn your product photos into top sellers from eCommerce product photography experts. And, Amazon’s photo editing requirements. Don’t be disheartened if you don’t manage to get perfect results immediately.
Product photography takes practice, lots of patience, and a bit of creativity. But, I promise, when you master it the results will speak for themselves. Isn’t it time you took your product photography to the next level? After all, amazing product photos will not only elevate your business but your brand too.
Pixc helps online sellers edit and optimise product photos to increase sales. Pixc turns average product photos into beautiful images, by editing and removing the background within 24 hours! Take advantage of your free trial, and let the results do the talking.


 Listen On YouTube
 Listen On Spotify
 Listen On iTunes